Mikroservis Mimarisinde Generic Email Consumer Yapısı Oluşturmak
- 28 Jun, 2024

Merhaba arkadaşlar,
Yakın zamanda mikro-monolitik olan projemi tamamen mikroservis mimarisine geçirdim ve bu süreçte çeşitli email template oluşturmam gerekiyordu. Bunu “Şifremi Unuttum, Hoşgeldin X kullanıcısı, Ödeme Başarılı, Ödeme Başarısız, Dekont, Şifre Sıfırlama” gibi başlıklar altında toplayabiliriz. Bu case karşısında olabildiğince generic bir yapı oluşturarak az kod, çok iş mantığını baz alarak Generic Email Consumer oluşturdum. Bu makalede ise size mikroservis mimarisinde böyle bir case karşısında nasıl bir çözüm sunabilirsiniz, bunu anlatacağım.
Yazımıza başlamadan önce hem proje altyapısını hem de projede kullanılan birkaç teknolojinin ne işe yaradığını kısaca anlatmak istiyorum.
Reflection Nedir?
Reflection, çalışma sırasındaki kodu incelememizi ve manipüle etmemizi sağlayan dahili bir .NET özelliğidir. Bu, bir türün meta verilerini (property’leri, fonksiyonları ve field’ları gibi) inceleyebileceğiniz ve bu türden nesneleri dinamik olarak oluşturabileceğiniz anlamına gelir.
Reflection kullanarak bir assembly içerisinde tüm tipleri elde edebilir ve bu tiplerin fonksiyonlarını, propertylerini ve diğer tüm elemanlarını inceleyebiliriz. Biz ise bize EmailTemplateModel tipinde gelen sınıfın tipini runtime sırasında öğrenip ona göre template oluştururken kullanacağız.
Masstransit Nedir?
.NET için geliştirilmiş olan, distributed uygulamaları rahatlıkla yönetebilmeyi ve çalıştırmayı amaçlayan, ücretsiz, open source bir Enterprise Service Bus Framework’üdür. Amazon SQS, RabbitMQ, Azure Service Bus ve ActiveMQ gibi birçok queue sistemini destekler. Masstransit hakkında daha fazla bilgi için Gençay Yıldız’ın ilgili yazısına bakabilirsiniz.
Mikroservis projemizde CommerceService’den, IdentityService’den ve PaymentService’den bize bazı email gönderimi için eventler fırlatılacak. Örnek eventler:
- SuccessPaymentEmailRequestEvent
- FailedPaymentEmailRequestEvent
- RegistrationEmailRequestEvent
- ForgotPasswordEmailRequestEvent
- SendInvoiceAsEmailRequestEvent
- ResetPasswordEmailRequestEvent
Email Service’deki GenericEmailConsumer’dan türemiş consumer sınıfları, email için belirlediğimiz kuyruğu dinleyip yukarıdaki sınıfları consume edecek. Bu sınıfları ilgili EmailModel sınıfına dönüştürdükten sonra ContentBuilder ve ResourceService aracılığıyla template’i oluşturacak sonrasında ilgili kişiye MailService ile mail gönderecek. Uygulama çalıştığı sürece bu işlemine devam edecek.
EmailService
├── Application
│   ├── Consumers
│   ├── Extensions
│   └── Services
│       ├── Abstract
│       ├── Concrete
│       │   ├── BaseService
│       │   ├── ContentBuilder
│       │   └── ResourceService
│       └── EmailWorker
├── Domain
│   └── EmailTemplateModel
│       ├── EmailRequest
│       ├── CreateInvoiceEmailTemplateModel
│       └── ...
├── Persistence
├── Configurations
├── Extensions
└── Files
Klasör yapımız bu şekilde olacaktır. Makalenin ilerleyen kısımlarında buraya tekrar değineceğiz. Öncesinde Shared katmanında oluşturmamız gereken birkaç attribute bulunuyor. Bu custom attribute’lere reflection ile EmailTemplateModelimizi dönerken ihtiyacımız olacak.
/// <summary>
/// Mark class as custom element. In this way, it can read attributes while html rendering
/// </summary>
public class CustomElementAttribute : Attribute { }

/// <summary>
/// Mark class as excluded element. In this way, it is excluded while html rendering
/// </summary>
[AttributeUsage(AttributeTargets.Property | AttributeTargets.Field, AllowMultiple = false)]
public class ExcludeAttribute : Attribute { }
CustomElementAttribute, reflection ile bir tipin elemanları arasında dönülürken o elemanın property olmaması durumunda reflection tarafında kullanılacak GetValue fonksiyonunda patlamaması için oluşturulan bir attribute. Örnek olarak CreateInvoiceEmailTemplateModel sınıfımızda Transaction adlı bir sınıf tutuyoruz. Reflection ile bunu döndüğümüzde değeri olmayacağı için bize hata fırlatacak. Bunu engellemek amaçlı Transaction sınıfının üstüne bu attribute’ü ekliyoruz.
ExcludeAttribute, adından da anlaşılacağı üzere bir tipin belli elemanlarını hariç tutmak için kullandığımız bir attribute. Örnek olarak her EmailRequestModel sınıfında Body propertymiz bulunmakta lakin biz bunu html template render edip oluşturacağımız için bu property’i hariç tutabiliriz.
Proje biraz büyük olduğu için sadece iki tane email template üzerinden göstereceğim. Makale sonunda proje linkini paylaşacağım, oradan inceleyebilirsiniz.
Shared katmanında Events/Mail altında EmailRequestEvent ve ForgotPasswordEmailRequestEvent gibi birkaç sınıf oluşturacağız. Ek olarak Domain/Constants altında EmailType enum oluşturuyoruz.
public class EmailRequestEvent
{
    public string To { get; set; }
}

public class ForgotPasswordEmailRequestEvent : EmailRequestEvent
{
    public string FullName { get; set; }
    public string ResetCode { get; set; }
}

public class SendInvoiceAsEmailRequestEvent : EmailRequestEvent
{
    public long TransactionId { get; set; }
}

public enum EmailType
{
    Registration = 1,
    ForgotPassword = 2,
    SuccessPayment = 3,
    FailedPayment = 4,
    Invoice = 5,
    ResetPassword = 6,
}
EmailService projesine geri dönelim. Burada Domain/EmailTemplateModel altında hem base sınıfı oluşturalım hem de diğer TemplateModel sınıflarını bu sınıftan türetelim.
public class EmailRequest
{
    public EmailRequest(EmailType emailType) {
        EmailType = emailType;
    }

    [Exclude]
    [Required]
    public EmailType EmailType { get; private set; }

    [Description("#EMAIL#")]
    public string To { get; set; }

    [Description("#SUBJECT#")]
    public string Subject { get; set; }

    [Exclude]
    public string Body { get; set; }
}
Burada html template üzerindeki tüm değiştirilecek olan kısımları #EMAIL# gibi bir format kullanarak belirtiyoruz. String.Replace metotu ile ilgili alanı bulup kolaylıkla değiştirebiliyoruz. Ayrıca yukarıda bahsettiğim üzere EmailType ve Body’i biz belirleyeceğimiz için onlar exclude edildi.
public class ForgotPasswordEmailTemplateModel : EmailRequest
{
    public ForgotPasswordEmailTemplateModel() : base(EmailType.ForgotPassword) { }

    [Description("#FULL_NAME#")]
    public string FullName { get; set; }

    [Description("#RESET_CODE#")]
    public string ResetCode { get; set; }
}
public class CreateInvoiceEmailTemplateModel : EmailRequest
{
    public CreateInvoiceEmailTemplateModel() : base(EmailType.Invoice) { }

    [CustomElement]
    public Transaction Transaction { get; set; }
    [CustomElement]
    public Product Product { get; set; }
    [CustomElement]
    public Vendor Vendor { get; set; }
    [CustomElement]
    public Address Address { get; set; }
    [CustomElement]
    public Coupon Coupon { get; set; }
}
Şimdi Files klasöründe yukarıda ilgili event sınıflarının html templatelerini oluşturalım. Aşağıda ödemesi başarısız olan bir işlemin email template’i bulunmakta.
<!DOCTYPE html>
<html>
 <head>
  <meta charset="utf-8">
  <title>#SUBJECT#</title>
  <style type="text/css">
   <!-- CSS Kodları -->
  </style>
 </head>
 <body>
  <div class="container">
   <p style="font-weight: bold; font-size: 18px;">Reset Password</p>
   <p>Dear #FULL_NAME#,</p>
   <p>We received a request to reset your password. We've posted a code below for password reset valid for 10 minutes.</p>
   <div align="center">
    <h4>#RESET_CODE#</h4>
   </div>
   <p>If you did not request this reset, please ignore this email.</p>
  </div>
 </body>
</html>
Application katmanında Services/Concrete altında ResourceService oluşturalım ve bu servisten hem dosya yolunu çekebileceğimiz hem de yukarıda görmüş olduğunuz #SUBJECT# alanını çekebileceğimiz fonksiyonlar oluşturacağız.
public class ResourceService : IResourceService
{
    public string GetContent(EmailType emailType)
    {
        var content = emailType switch
        {
            EmailType.Registration => File.ReadAllText("../../Files/RegistrationEmailTemplate.html"),
            EmailType.ForgotPassword => File.ReadAllText("../../Files/ForgotPasswordEmailTemplate.html"),
            EmailType.SuccessPayment => File.ReadAllText("../../Files/SuccessPaymentEmailTemplate.html"),
            EmailType.FailedPayment => File.ReadAllText("../../Files/FailedPaymentEmailTemplate.html"),
            EmailType.Invoice => File.ReadAllText("../../Files/InvoiceEmailTemplate.html"),
            EmailType.ResetPassword => File.ReadAllText("../../Files/ResetPasswordEmailTemplate.html"),
        };

        return content;
    }

    public string GetSubject(EmailType emailType)
    {
        var subject = emailType switch
        {
            EmailType.Registration => "Welcome To Website!",
            EmailType.ForgotPassword => "Website - Forgot Password!",
            EmailType.SuccessPayment => "Website - Payment Successfull!",
            EmailType.FailedPayment => "Website - Payment Failed!",
            EmailType.Invoice => "Website - Invoice",
            EmailType.ResetPassword => "Website - Password Reset Completed!",
        };

        return subject;
    }
}
Bu kısmı daha dinamik yapabilirsiniz. Veritabanından yada başka bir kaynaktan çekebilirsiniz. Ben şuanlık en basit haliyle yazıp devam ediyorum. Sırada yazımızda önemli rol oynayan ContentBuilder sınıfımız var. Gelin, inceleyelim.
public class ContentBuilder : IContentBuilder, IDisposable
{
    private readonly IResourceService _resourceService;
    private string _content;
    public ContentBuilder(IResourceService resourceService)
    {
        this._resourceService = resourceService;
        _content = string.Empty;
    }

    public string Build(EmailRequest model)
    {
        Type modelType = model.GetType();
        PropertyInfo[] properties = modelType.GetProperties();

        _content = _resourceService.GetContent(model.EmailType);

        foreach (PropertyInfo property in properties)
        {
            var excludedAttr = property.GetCustomAttribute<ExcludeAttribute>();
            var descriptionAttr = property.GetCustomAttribute<DescriptionAttribute>();
            var customElementAttr = property.GetCustomAttribute<CustomElementAttribute>();

            if (excludedAttr != null)
                continue;

            if (customElementAttr == null)
            {
                if (descriptionAttr != null)
                {
                    string parameterName = descriptionAttr.Description;
                    object propertyValue = property.GetValue(model);
                    _content = _content.Replace(parameterName, propertyValue == null ? string.Empty : propertyValue.ToString());
                }
            }
            else
            {
                var propertyInfos = property.PropertyType.GetProperties(BindingFlags.Public | BindingFlags.Instance);

                foreach (var propInfo in propertyInfos)
                {
                    descriptionAttr = propInfo.GetCustomAttribute<DescriptionAttribute>();

                    if (descriptionAttr != null)
                    {
                        string parameterName = descriptionAttr.Description;
                        object propertyValue = propInfo.GetValue(property.GetValue(model));
                        _content = _content.Replace(parameterName, propertyValue == null ? string.Empty : propertyValue.ToString());
                    }
                }
            }
        }

        return _content;
    }
    public IContentBuilder AddSubject(string subject)
    {
        _content = _content.Replace("#SUBJECT#", subject);
        return this;
    }

    public void Dispose()
    {
        _content = string.Empty;
    }
}
Build metotumuzun içine girdiğimizde yazdığımız kodları madde madde açıklayalım.
- Öncelikle bize gelen sınıfın tipini öğrenip bu tipin elemanlarına yani propertylerine erişiyoruz.
- Sonra yukarıda anlatmış olduğum resource servisteki GetContent metotunu çağırarak html template’i elde ediyoruz.
- Tüm propertyleri teker teker döngüye soktuk.
- İlgili property bu attributelere sahip mi diye kontrol sağlıyoruz.
- Eğer bu property ExcludeAttribute’üne sahipse yani hariç tutulmuşsa continue diyip diğer elemana geçiyoruz.
- Eğer CustomElementAttribute yoksa yani normal bir property ise bu koşulun içine giriyor, DescriptionAttribute kontrolü sağlıyoruz. Sonuçta template’de bir alan ifade ediyor olmalı. Gerekli koşullar sağlandıktan sonra property değeri templatedeki yerini alıyor.
- Sonda ise yukarıda bahsettiğimiz olayların aynısı yaşanıyor. Farklı olarak bu property CustomElement ile işaretlendiği için aslında bir sınıf. Onun da propertylerine erişip aynı işlemleri yapıyoruz. (Burayı sınıf özelinde geliştirdik ancak sizin ihtiyaçlarınıza bağlı olarak Factory Design Pattern kullanarak ilgili ValueProvider sınıfı oluşturabilirsiniz.)
Son olarak template’imizi oluşturduk, sadece #SUBJECT# kısmı kaldı. Onu da GenericEmailConsumer içerisinde çağıracağız.
Application/Consumers klasörüne gelip GenericEmailConsumer sınıfını oluşturuyoruz.
public class GenericEmailRequestConsumer<TEmailEvent, TEmailModel> : BaseService, IConsumer<TEmailEvent>
    where TEmailEvent : EmailRequestEvent
    where TEmailModel : EmailRequest
{
    private readonly IContentBuilder _contentBuilder;
    private readonly IResourceService _resourceService;

    public GenericEmailRequestConsumer(IContentBuilder contentBuilder,
                                     IResourceService resourceService)
    {
        this._contentBuilder = contentBuilder;
        this._resourceService = resourceService;
    }

    public async Task Consume(ConsumeContext<TEmailEvent> context)
    {
        var @event = context.Message;

        var emailModel = Mapper.Map<TEmailEvent,TEmailModel>(@event);

        var subject = _resourceService.GetSubject(emailModel.EmailType);
        var body = _contentBuilder
            .AddSubject(subject)
            .Build(emailModel);

        //Email db işlemleri

        var result = await MailService.SendEmailAsync(new SendEmailRequestDto()
        {
            To = new List<string>() { emailRecord.To },
            Subject = subject,
            Body = body,
            Email = "adiniz@soyadiniz.com",
            Password = "CokGucluSifre123"
        });

        if (!result.IsSuccess)
        {
            //Email db işlemleri
        }
    }
GenericEmailConsumer sınıfımızı IConsumer interface’inden türetip generic olarak 2 tane parametre alıyoruz. Bunlardan TEmailEvent bizim EmailRequestEvent’den türemiş sınıf, TEmailModel ise render için kullanacağımız Email Model. Şimdi Consume metotu içerisinde yaptıklarımızı madde madde açıklayalım.
- Öncelikle bize gelen EmailRequestEvent sınıfını elde edelim. Sürekli Context.Message diye çağırmayalım.
- Sonrasında bize gelen bu sınıfı gerekli EmailTemplateModel’e mapleyelim. Burada istediğiniz mapper aracını kullanabilirsiniz. Ben burada Mapster kullandım.
- Subject değerini alıp bunu parametre olarak kullanıyoruz. Artık elimizde bir html body var.
- (İsteğe bağlı) Emaillerin gönderilmemesi yada kaybolması ihtimaline karşın bize gelen emailleri öncesinde veritabanına kaydediyor, sonrasında EmailService’i çağırıp mail gönderiyoruz. Mail gönderme işlemi başarısız olması durumunda geçerli kayıtı Failed olarak işaretliyoruz. Burada db’ye kaydetme kısmına değinmeyeceğim ancak projede bu bahsettiğim kısmı inceleyebilirsiniz.
Son olarak artık bu sınıfı türeteceğimiz sınıflar oluşturalım ve çıktıyı gösterip makaleyi sonlandıralım.
public class ResetPasswordEmailRequestConsumer : GenericEmailRequestConsumer<ResetPasswordEmailRequestEvent, ResetPasswordEmailTemplateModel>
{
    public ResetPasswordEmailRequestConsumer(IContentBuilder contentBuilder, IResourceService resourceService) : base(contentBuilder, resourceService)
    {

    }
}
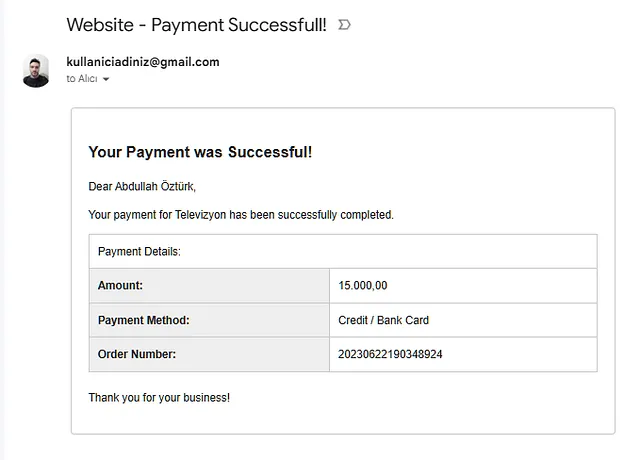
Bu kadar basit bir şekilde implemente edebiliyoruz. Rabbitmq ile mesaj gönderme kısmına girmeyeceğim lakin gönderme sonrasında emailimize gelen çıktıyı sizlere göstermek istiyorum.
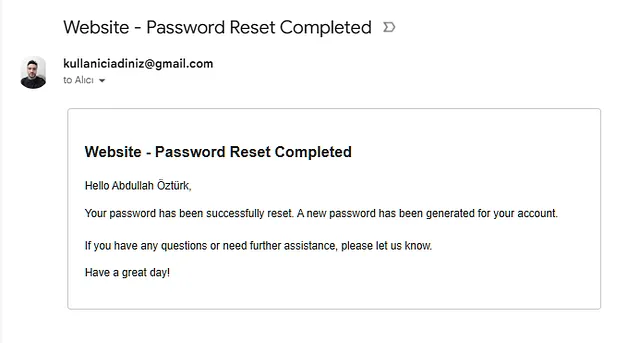
Bu yazıda custom attribute oluşturup nasıl html template render edebileceğinizi, masstransit altyapısıyla daima çalışan bir background service oluşturup reflection ile render işlemi yaparak generic email consumer yapısı nasıl oluşturulacağı ile alakalı sorunlara kendimce çözüm üreterek sizlerle paylaştım.
İlgilenenler için Projeye buradan erişebilirsiniz.
Okuduğunuz için teşekkür ederim. Faydalı bulduysanız beğenilerinizi eksik görmeyin. Bir sonraki yazıda görüşmek dileğiyle.